PictureFrame Wizard -
Help PictureFrame Wizard -
Help |
PictureFrame Wizard -
Help
Date labeling
Each picture when shot with a digital camera
contains extra information, like the date the picture was taken, the picture size, the type
of camera, the camera settings, etcetera. This data is also known as the
EXIF data and is invisibly stored in the compressed image (usually of jpg format).
In some cases also the GPS location is stored. When a thumbnail is doubleclicked, the picture viewer is started and all
available EXIF data is shown. Use the button on the top to sort the viewer to
'Date' (oldest picture left-top), 'Name' (alpha-numerical sorting), 'Pixel size' (width x height) and 'Size' (file size). The 5 steps for date labeling In the tab 'Picture frame' the controls to set and position the
labels are found. The following basic 5 steps must be taken to define, position,
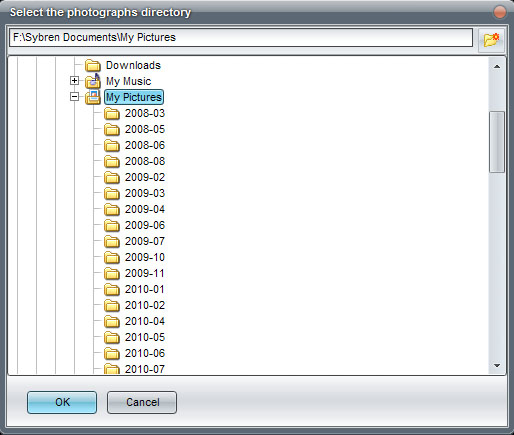
set and run the date labeling for a folder of pictures. Step 1: open the folder that needs to be
labeled. Step 2: select the dimensions of the picture
frame. The size is automatically preset and shown in the two
boxes. In case the model is not available, manually 'override' the settings and
fill the pixel dimensions yourself. This is a very important step, since all
consequent actions depend on these pixel dimensions. When the 'Manual size' tickbox
is checked two pop-up windows will appear to indicate the width and
heigth of the picture frame in pixels. When unchecked the current model
preset size is selected again. Step 3: select the font. Step 4: define the text content. For safety reasons (avoid overwriting existing files) this setting is not
kept at application exit, you need to manually set this extension each time you
start the application.
PictureFrame Wizard
is able to extract this information and use it to determine the date label for
that picture. In the 'Explorer' tab the overview of a picture folder is seen,
and when a picture is clicked, the basic picture date information is shown on
the right side of the screen.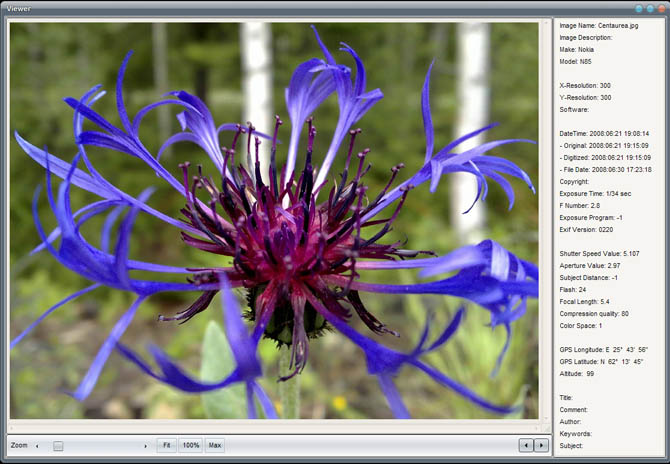 Left: double-click on the
explorer will show all picture details
Left: double-click on the
explorer will show all picture details
Click on the
tab 'Explorer'. By selecting the
folder in this (tiny) explorer, or via 'File |Open
folder' , a directory of pictures is selected and loaded. In case 'File | Add folder' is selected, the new folder is added to
the thumbnails in the tab 'Explorer'. When a thumbnail
picture is clicked that piicture is selected in the 'Labeler' window (and tab). Please note that when landscape
and portrait pictures must be labeled, the user needs to do the labeling
twice (once for each orientation).
Note: for practical purposes (CPU usage, slowing down the process)
the amount of pictures should not exceed 10,000.
The easiest way to find the dimensions of the pictures in the
picture frame is to select the Manufacturer and the Model from the drop-down
lists. 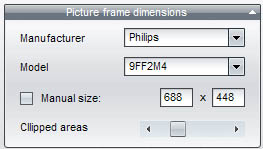
First select a font
and then increase of decrease ('A' buttons) to find
the best size. The other buttons are used to align the text on each picture.
From left to right: top, bottom, left, center, right. The last buttons are
pressed to Bold, Italic,
Shade or Outline the text. The shadow can be moved to right-bottom with the two
little arrows (these are located in the 'Text' box, see below). 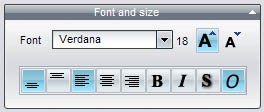
The only
predefined text is the date of the picture. The 'pre-text' and 'post-test' edits can be used to add additional text
to each picture, such as 'Norway' or 'Bitihorn climb'. The date format is chosen
from a pre-selection from the drop-down box. The text is live-updated in
the labeler window to see the effect. Note: the
quality of the text in the preview window is slightly degraded to allow for
quick live-update. The quality of the text in the final picture is of hight
quality of
course!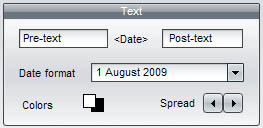
The colors of the font can be selected
by pressing on the colored square. The default is white (head) and black
(shade). The shadow can be moved with the little arrows on the right.
In case you
only want
to label the current picture, don't forget to also check the box 'Only label this picture'.
Step 5: start the batch and save the
pictures
By pressing the button Start
labeling' the batch is started. You are prompted to indicate where the
pictures must be saved. Make sure the original files are not overwritten. The
size of the picture will exactly match the size of the picture frame. This way
the amount of pictures can increase from 10-50 times more than when original
pictures are used to load the memory chip of the picture frame. Do this for
landscape and portrait picture separately.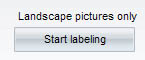
 The save dialog asks where the
labeled picture must be saved
The save dialog asks where the
labeled picture must be saved
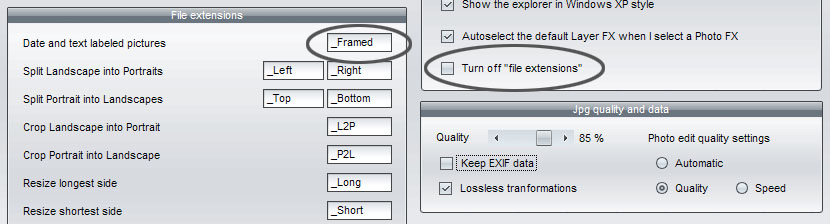
By default the files will have new
names to avoid accidental overwriting of the original. The name is
compiled from the original name with an extension. The default extension is
'_Framed', but you can select any extension you wish (or no extension
at all). In the tab 'Settings' the checkbox for 'Turn off "file extensions"' determines if a file extension is used. This file
extension is turned on (=
unchecked) by default.